


How to Screenshot on Windows 11 and 10? Occasionally, you must preserve what’s seen on your screen. You may want to save anything for future quick access, or you might want to share something with friends or family. Thankfully, there are a few simple methods for taking screenshots of all or a portion of your screen, whether you’re using Windows 10 or Windows 11.
Even though it no longer sells Windows 10, the software behemoth will continue to maintain the OS until October 2025. For a few more years, you can continue to apply these screenshot tricks and avoid the need to upgrade to Windows 11.
This article explains how to take screenshots in Windows 10 and 11 using built-in tools and other shortcuts, so you may compare the two and see which you prefer.
Snip & Sketch
Compared to the previous Snipping Tool, the Snip & Sketch tool makes it simpler to access, share, and annotate screenshots. It now has the ability to take a screenshot of a window on your desktop, which was a startling absence when the software was initially released and forced us to use Team Snipping Tool until lately.
The keyboard shortcut Windows key + Shift + S is the simplest method to open Snip & Sketch. The Snip & Sketch tool is also accessible via the Start button’s alphabetical app list and the notification panel, where it appears as Screen snip. If you don’t want to commit the keyboard shortcut to memory, you may also simply search for it. (If you capture screenshots often, we suggest pinning the application to the taskbar.)

You may select to capture a rectangle, freeform, window, or full-screen screenshot by using the keyboard shortcut or the notification button, which will also cause your screen to darken and reveal a little menu at the top of the screen.
Your screenshot will be copied to your clipboard and shown in the lower-right corner of your screen for a brief period of time after you capture it. To edit, save, or share the screenshot, click the notification to open it in the Snip & Sketch app. (If you open the notification panel and find it sitting there, you missed the notice.)
The Snip & Sketch window will open when you launch it via the Start menu or by searching for it; the little panel at the top of the screen won’t appear. To start a screen capture and open the tiny panel, click the New button located in the top left corner. This method requires an additional step, but it allows you to postpone taking a snapshot. In order to pause a snip for three or ten seconds, click the down-arrow button next to the New button.
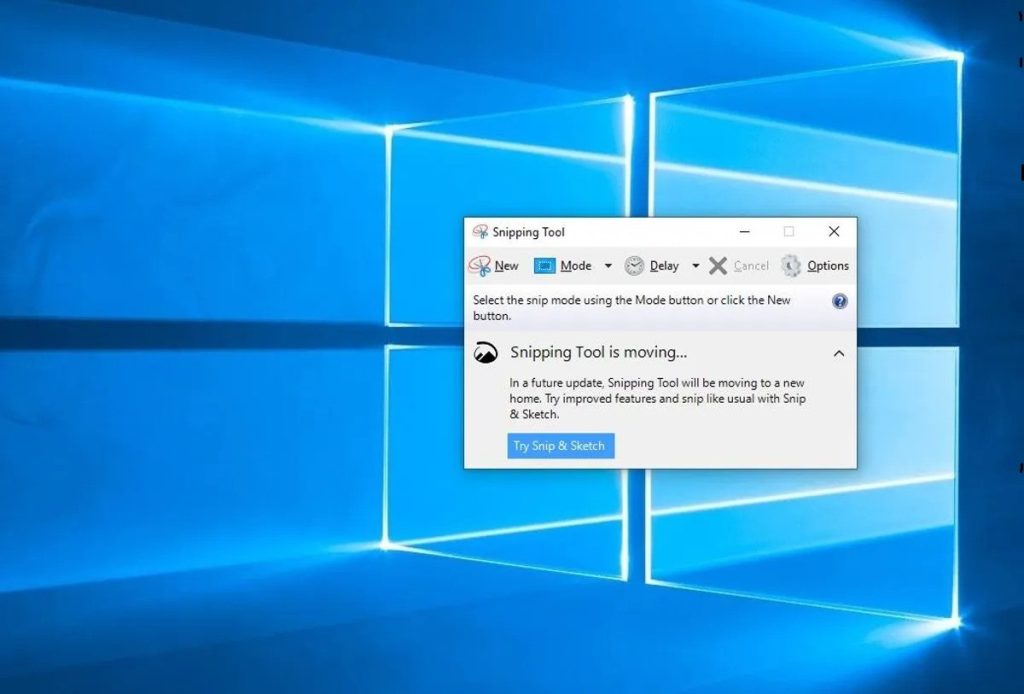
Snipping Tool
Since Windows Vista, there has been a Snipping Tool available. Although Windows has been announcing for a few years that the Snipping Tool would be discontinued, it remains functional in Windows 11. Although the Snipping Tool is no longer available in the Start menu’s program list, you can still quickly find it using the search bar.
Press the New button to start taking a screenshot. Rectangular snips are the default, but you may also capture full-screen, window, and free-form snips.
Snipping Tool copies your grabs to the clipboard automatically, but it does not store your screenshots; you will need to save them manually in the tool before you close it.
Print Screen
Press the Print Screen (occasionally PrtScn) key to take a screenshot of the complete screen. The screenshot you take will be transferred to the clipboard rather than being saved as a file. You must launch an image editing program (like Microsoft Paint), paste the screenshot into it, and then save the file.
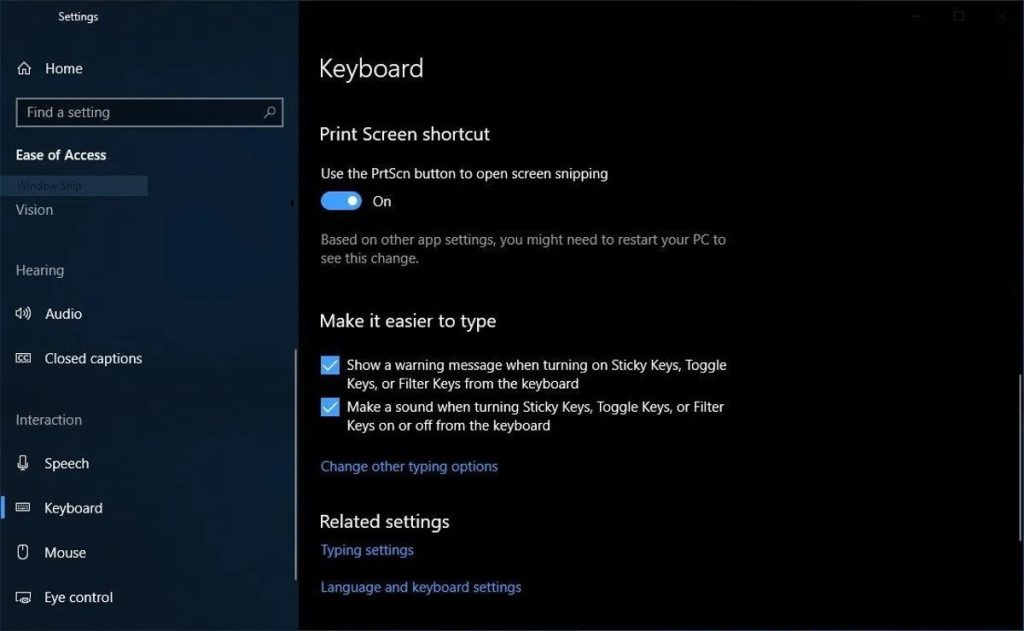
By heading to Settings > Ease of Access > Keyboard and turning on Use the PrtScn button to start screen snipping under Print Screen Shortcut, you can also configure the PrtScn button to launch the Snip & Sketch tool.
Press the Windows key and the Print Screen shortcut.
Press the Windows key + Print Screen key to take a snapshot of your complete screen that is saved automatically. A momentary darkening of your screen will signal that you have successfully captured a screenshot, which will be stored in the Pictures > Screenshots folder.
Press Alt + Print Screen
Use the keyboard shortcut Alt + PrtScn to snap a fast screenshot of the window that is now active. This will take a snapshot of the window that is now open and copy it to the clipboard. To save the photo, you’ll need to open it in an image editor.
Not a key for Print Screen?
Don’t worry if your machine lacks the PrtScn key—Microsoft offers an alternative keyboard shortcut. To capture a screenshot, use Fn + Windows logo key + Space Bar. Next, it will be placed in the Pictures > Screenshots folder for storage.
Game bar
Whether you’re playing a game or not, you can take a snapshot using the Game bar. Make sure that Record game clips, pictures, and broadcasts using Game bar is toggled on in the options tab before proceeding.
Once enabled, to open the Game bar, press the Windows key and the G key. From here, you may take a full-screen screenshot by clicking the screenshot button in the Game bar or by using the standard keyboard shortcut Windows key + Alt + PrtScn. Go to Settings > Gaming > Game bar to configure your own keyboard shortcut for the Game bar screenshot.
Windows Logo + volume down
You can take a screenshot of your whole screen with a Microsoft Surface device by using the actual (well, kind of physical) buttons, just as you would with any other phone or tablet. To do this, press and hold the physical volume-down button on the side of the tablet while holding down the Windows Logo touch button at the bottom of your Surface screen. The screenshot will be immediately saved to the Pictures > Screenshots folder when the screen temporarily dims.


